Sunday, October 30, 2011

Insulating the Eaves and Attic

Not a project to look forward to, but we sure are glad its done! When we took out the old blown insulation in July, we intended to put new stuff back the next day. Three months later it was still as empty as the day we cleared it out.

When we reached October and the weather got colder, nights were not pleasant in out house. We were already using the comforter and fleece blanket on our bed. It was time to re-insulate so our first free weekend we got into our suits and got to work.

In the eaves we put R22 between the studs with a layer of vapour barrier on top. Tom hung out in the hall cutting and I hung out in the crawlspace installing and stapling. After laying down R40 on the floor, the eave was done. About an hour and a half of work but it made a huge difference to the temperature on the 2nd level.

The week before we hired a contractor to fix the bathroom vent so it actually vented outside. While he was up in the attic, he noticed a lack of insulation in some areas. So while I was in my suit, I climbed up there and added a little more insulation to the floor. It was really dusty and poorly lit, giving the whole space a kind of ethereal vibe.
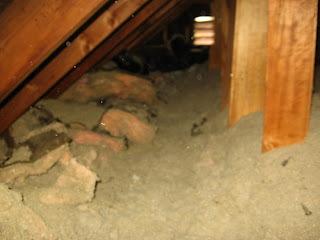
And now we know: hanging out in a 2 foot high attic space with poor lighting and insulation floating around is not something I want to do again. It probably will be done because I am cheap and Tom is claustrophobic, but I will not enjoy it. Installing insulation in the eaves on the other hand was a lot less work that anticipated and a lot more pleasant when it was not 30 degrees out.

Saturday, October 29, 2011

Installing the Door Jamb

The lovely jamb I built the previous weekend was all set and ready to be installed. I gave it a light sand and got to work filling in that hole.

I added some shims to level it out and tried nailing it in place. Unfortunately the edges started to split. Screws would have left giant holes, so I used a ton of adhesive and glued it in place. This is a low traffic area and I did add a couple of screws in a hidden spot at the back, so hopefully it will stay in place. It still needs to be stained or a clear coat added so it blends in a bit more with the existing floors.

And now we know: was not too hard to install and really makes a difference to have the gap covered up.

Sunday, October 23, 2011

Cutting a Door Jamb

One of the things on my to-do-in-the-future-sometime list was to fill in the gap in the floor under the new door we installed in the upstairs hall. It has been sitting in this state for a year and a half now and looks pretty bad.

The gap is about 4 inches and both sides have the same wood flooring, so my plan was to patch it with left over maple flooring from the backroom install. When I test fit a piece I realized that not only were the pieces different heights, but the wood below was uneven and the flooring edges were not straight. So I ruled out the floorboards. Then I thought a pre-made wood jamb would work, unfortunately they only come 3 ¼” wide so that was too small.

A custom jamb it is! I used leftover maple from the dining table project, patched 2 pieces together, cut them down, angled the edges and created a lip along the underside edges. The final project is a little wonky, but once it is sanded and installed, you will never know.

And now we know: patching floors in an old house is never easy

Thursday, October 20, 2011

Re-painting the Dining Room Chairs

I was kinda bored one evening and the different colours of the dining room chairs began to bother me. I had 6 originally that I painted brown and then I got 2 more but was sick of the brown so painted them black. I always meant to go back and repaint the original 5 (one had broken) but it was never a priority. Much to Tom’s pleasure, I got out the paint and set up shop in the back room. You can really see the difference when they are side by side.

It looks much improved with a fresh coat (or 2) of paint and now they all match nicely. They still need some bracing below though, some of the older chairs are getting rickety….

And now we know: matching chairs, what a revolutionary idea! Looks much better

Sunday, October 2, 2011

Finishing the End Table

Before I can buy the wood to build my chairs I have to do the following 5 things:

1 – finish the little end table for the front room

2 – sand and paint the stairs

3 – patch the floor underneath the closet door in the upstairs hall

4 – replace the drawer glides on my dresser

5 – fix the door handle on our bedroom door

This list was part self imposed (giving myself a reward for doing all the less fun little projects) and part imposed by my lovely husband (he hates when I have a bunch of stuff on the go). So here I am on my first task, staining and clear coating the end table I built.

I used water based stain to match the end table already in the room. This time I found it almost opaque and the top turned out almost solid brown. All the detail of the herringbone pattern is lost. For the sake of completion I left it as is and put a coat of polycrilic on top…but one day I will strip the top and use a lighter colour or something.

It looks good in place, matching but not identical to the one at the other end of the sofa. If you squint your eyes you can almost see the pair of lamps on either table that I will one day be able to afford

And now we know: the Minwax water based stains now have to be mixed at the paint counter and seem to be much more opaque. I will stick with the oil based in the future.